🌙How to Improve Night Vision on Security Cameras

TLDR
- Better lighting beats better specs in many cases: Even modest outdoor lighting can dramatically improve nighttime footage quality.
- Camera placement matters at night: Avoid glare, backlighting, and reflective surfaces that can wash out images.
- Clean lenses and remove obstructions: Dirt, spiderwebs, moisture, and smudges often ruin night vision more than people realize.
- Adjust camera settings when available: Motion sensitivity, exposure, HDR, and infrared settings can noticeably improve results.
- Don’t rely on distance alone: Security cameras capture clearer nighttime footage when focused on smaller, targeted areas instead of wide spaces.
Daytime security footage tends to make people feel pretty confident. Everything looks sharp. You can spot faces, license plates, packages on the porch, and maybe even your neighbor’s cat treating your driveway like personal property. Then nighttime arrives. Suddenly, the footage looks grainy, washed out, oddly blurry, or somehow both too dark and too bright at the same time.
If that sounds familiar, do not panic. In most cases, poor security camera night vision is completely fixable without replacing your entire network infrastructure. When you look at how home burglaries actually happen, a vast majority of opportunistic breaches happen under the cover of darkness.
The truth is, learning how to improve night vision cameras usually comes down to a few practical adjustments: smarter placement, better lighting, cleaner lenses, and realistic expectations about what sensors can actually see in pitch black conditions. Let’s look at how to maximize your system’s performance after the sun goes down.
💡 Add Light First, Not a New Camera
This might sound surprisingly unexciting, but it is probably the single most effective thing you can do. Security devices work better when they have ambient lumens to work with. Even hardware equipped with the latest infrared illumination produces cleaner footage when there is some extra environmental lighting nearby.
When you choose to add lighting for night cameras, you ease the technical load on the image sensor. A simple porch light, pathway lighting, or a motion-triggered floodlight can instantly transform a grainy gray image into a sharp, clear scene. This is a highly cost-effective strategy if you are trying to design a home security system on a budget.
Simple Lighting Options
- Motion-Activated Floodlights: Blasts the area with white light, forcing the camera into crisp daytime color mode.
- Soft Porch Lighting: Illuminates the immediate entryway without creating massive shadow pools.
- Pathway LEDs: Provides a low-level light path that highlights walking subjects from the ground up.
- Low-Glare Accent Lights: Keeps the property looking occupied while eliminating dark hidden zones.
The goal is to achieve visual balance. You want enough illumination to reveal facial details without blasting the camera with harsh, direct brightness. Too much light aimed straight into the lens will cause the sensor to overcompensate, plunging everything around the light source into deep shadow.
Nighttime Lighting Scenarios
| Lighting Situation | Typical Footage Result | Operational Action |
| Zero Ambient Light | Grainy, soft, or muddy footage | Add soft fill lighting to the perimeter |
| Balanced Nearby Light | Clear facial detail and distinct edges | Ideal setup for high-fidelity identification |
| Harsh Direct Spotlight | Washed-out, ghostly white faces | Adjust the light or camera angle immediately |
| Strong Backlighting | Dark, unidentifiable silhouettes | Reposition the primary light source behind the lens |
A small amount of thoughtful illumination often beats buying a much more expensive piece of hardware. This is one of the most frequently overlooked fixes in the entire DIY space.
📷 Reconsider Your Camera Placement
At night, your choices regarding physical positioning become infinitely more important than they are during the day. A location that looks perfectly fine at noon can become completely useless after sunset because light behaves differently in the dark. Glare, reflections, car headlights, and deep shadows can ruin what would otherwise be a great viewing angle.
One of the most destructive placement errors is mounting a camera behind a windowpane. If you have ever wondered why your indoor camera turns into a foggy white mess after dark, the window glass is the culprit. The camera’s built-in infrared LEDs bounce directly off the pane and reflect straight back into the lens, blinding the sensor.
For guidance on navigating hardware positions, you can review the Google Nest night vision troubleshooting steps to see how physical barriers degrade sensor performance.
Placement Pitfalls to Avoid
- Aiming lenses directly toward bright streetlights or neighboring security fixtures.
- Positioning the camera where it captures large gutters or white walls in the immediate foreground.
- Installing indoor cameras behind exterior glass panes while leaving infrared mode turned on.
- Placing hardware in areas where trees block the light, creating an accidental blind spot.
If your layout forces you to cover a wide space, make sure you know exactly where to place security cameras for maximum coverage without exposing the system to blinding light sources.
🔦 Understand How Infrared Night Vision Actually Works
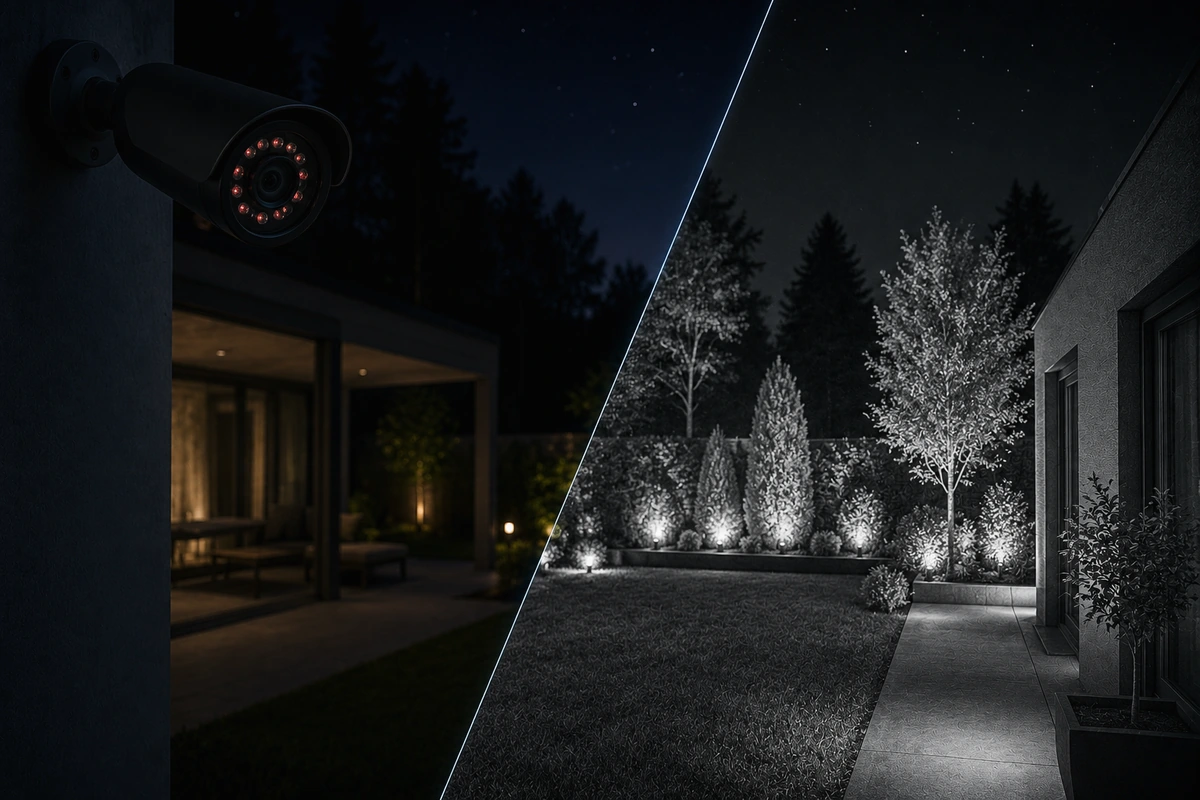
Most modern consumer cameras rely on infrared (IR) illumination to see in the dark. The camera emits infrared light that is invisible to the human eye, then uses an internal cut filter to capture that light as it bounces off objects in the area. This is why most nighttime security videos appear in black and white. The camera is essentially operating its own invisible flashlight.
However, infrared light has distinct physical limitations. It decreases in effectiveness rapidly over distance. If you are trying to learn how to get better night footage security cameras can capture, you must understand that objects need to be relatively close to reflect that light back to the lens.
Ideal Infrared Conditions
- Keep your target subjects within the specified effective range of your IR LEDs (usually 20 to 30 feet for DIY gear).
- Limit the wide open space in the frame to prevent the light from scattering uselessly into the sky.
- Minimize highly reflective surfaces like metal sheds or vinyl siding that cause localized glare.
- Ensure your system has adequate backup power solutions to keep those power-heavy IR arrays lit during a blackout.
If you rely solely on standard wireless hubs, always check how reliable wireless security systems are when operating at their maximum distance under nighttime conditions.
🧼 Keep Lenses Clean and Clear
Night vision drastically exaggerates tiny physical imperfections on the camera housing. What looks like an invisible smudge during bright daylight can become a giant, glowing orb at night when the infrared lights activate.
Spiders are oddly attracted to security cameras because insects gather near the warmth and light of infrared LEDs. A single web hanging inches from the glass can trigger motion alerts all night while completely ruining your video feed.
Monthly Lens Cleaning Protocol
- Clear Spiderwebs: Use a soft broom or compressed air to clean the mounting brackets and casing.
- Wipe the Glass: Use a clean microfiber cloth and an anti-static lens cleaner to remove smudges and film.
- Check for Moisture: Ensure the weather seals are tight to prevent interior condensation.
- Trim Nearby Plants: Cut back any stray leaves that could reflect IR light back into the sensor.
Regularly performing this quick cleaning step is an easy way to avoid common DIY home security failures like missing an event due to a blurry lens.
⚙️ Adjust Your Internal Camera Settings
Many homeowners never touch their device configuration after the initial installation. If the smartphone app says “connected,” they simply move on with life. However, exploring your advanced low light camera settings security menus can provide a noticeable bump in performance.
Many modern applications hide useful adjustments deep within their advanced menus. For example, turning on High Dynamic Range (HDR) can help balance a scene where one side of your driveway is brightly lit by a porch lamp while the other side sits in deep darkness.
Settings to Audit
- Night Vision Sensitivity: Adjusts how early the camera toggles its infrared cut filter as dusk approaches.
- Exposure and Shutter Speed: Tweaking these can help reduce the ghostly motion blur seen when people walk past quickly.
- Infrared LED Power: Some brands let you dim the internal IR lights to prevent washing out faces that come close to the lens.
- Network Bitrate: Setting the recording quality to maximum ensures compression doesn’t destroy low-light details, which is crucial if you are deciding between local storage vs cloud storage for security cameras.
Taking ten minutes to check these settings ensures you aren’t falling victim to the the most common security mistakes homeowners make.
🚪 Narrow Your Focus Area to Specific Choke Points
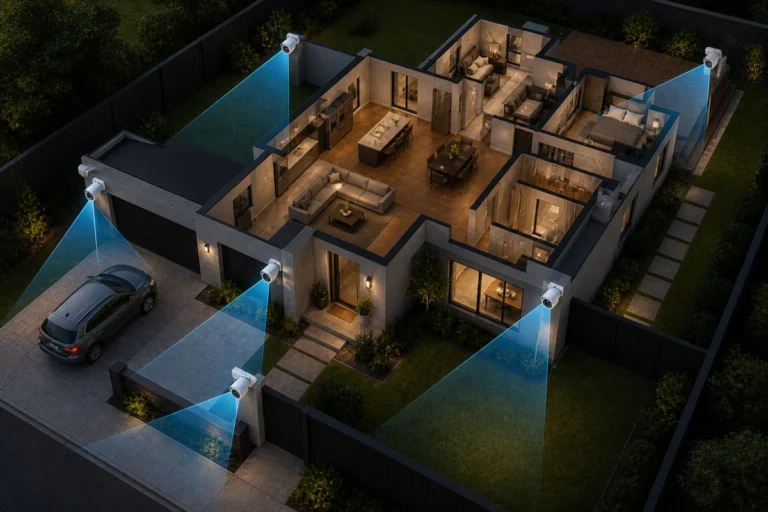
One of the biggest mistakes in DIY home defense is trying to watch too much space with a single camera. At night, this problem gets significantly worse. A wide-angle camera aimed across an expansive backyard might tell you that a shape moved, but it won’t provide the detail needed to identify a face or clothing pattern.
Instead, prioritize tight, high-value areas. You want human subjects to fill as much of the digital frame as possible. This is a core philosophy when building a stable layered home security framework.
Key Targets for Tight Framing
- The Front Porch: Frame the shot so you can capture features clearly, matching the principles used in apartments and rentals.
- Side Gates: Keep the view restricted to the walkway path to maximize pixel density.
- The Garage Door: Focus directly on the driveway threshold where vehicles or intruders must cross.
By narrowing your scope, you drastically improve your chances of getting actionable evidence rather than a blurry, pixelated shape.
🌧️ Environmental Realities and Technical Limits
Night vision is bounded by the laws of physics. Rain, thick fog, heavy humidity, and even airborne pollen will reflect infrared light back into the lens, creating halos or hazy footage. Sometimes users assume their camera has suddenly broken, when the weather is simply limiting their visibility.
The same reality applies to car headlights. A vehicle pulling into a driveway at night can temporarily blind a camera sensor, causing it to take several seconds to adjust its exposure settings.
This is exactly why you need to build redundancy into your layout. Pairing your cameras with motion sensors or door sensors ensures that even if a camera is temporarily blinded by a car’s high beams, your perimeter alarm will still trip if a door is forced open.
🛠️ When It Is Actually Time to Upgrade Your Hardware
Sometimes, no amount of cleaning or lighting adjustments can save a outdated sensor. Older 720p or low-end 1080p hardware from five years ago simply lacks the physical low-light capabilities of modern gear. If your nighttime video remains completely unusable after optimization, it might be time to upgrade night vision home cameras.
When shopping for the best night vision security cameras, ignore the marketing buzzwords and look closely at the sensor size and low-light aperture ratings (like f/1.6 or lower).
Many modern systems now feature advanced low-light sensors that can capture full-color video in near-total darkness without needing a blinding spotlight. This is a fantastic step to take when you are ready to upgrade your DIY setup over time.
When to Upgrade Checklist
- Your current nighttime footage remains grainy even after you add lighting for night cameras.
- Intruders moving at a normal walking pace turn into a completely unidentifiable, ghostly blur.
- The built-in infrared lights can barely project more than ten feet into your yard.
- Your current brand forces heavy cloud compression that ruins low-light textures.
🏁 Conclusion: Small Adjustments Deliver Major Protection
When nighttime video quality looks disappointing, the immediate instinct is to look for a replacement system online. While upgrading hardware can solve problems, more often than not, the true fix is simpler and much cheaper than a trip to the store.
A quick lens cleaning, a minor adjustment to your viewing angle, a strategically placed porch bulb, or a narrower focus on your main entrances will completely transform your security camera night vision performance. Don’t let your property fall victim to vulnerabilities despite having physical locks.
Take an hour this weekend to go outside, inspect your cameras after dark, and fine-tune your positioning. Giving your equipment a proper fighting chance in the dark is the best way to ensure your home stays protected 24 hours a day. Remember to include your cameras in your routine when testing your home security system regularly to keep your defenses operating at peak performance.