👁️ Where to Place Security Cameras for Maximum Coverage
TLDR
- Prioritize major entry points like the front door, back door, first-floor windows, and garage access.
- Mount outdoor lenses 8 to 10 feet high and angle them downward to capture usable facial details.
- Design overlapping fields of view to completely eliminate vulnerable coverage gaps around your perimeter.
- Position indoor hardware in high-traffic transition zones rather than private personal spaces.
- Combine your visual surveillance layout with motion lighting and alarm sensors for layered protection.
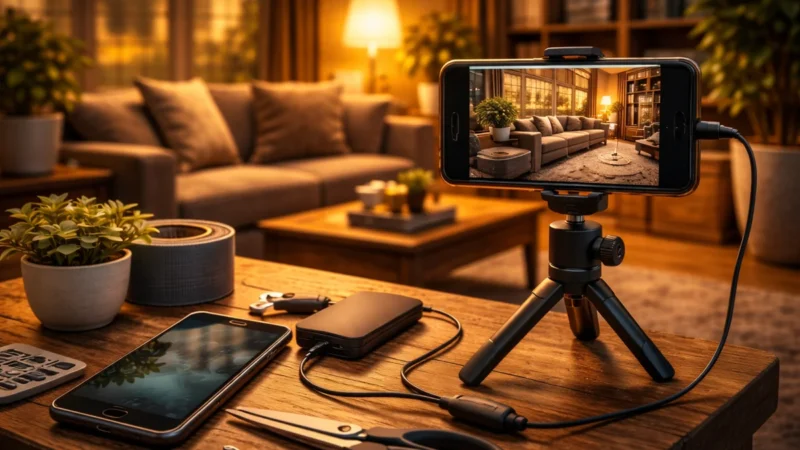
Buying high-quality hardware is only half the equation when protecting your property. Where you place them determines whether they actually keep you safe or simply give you a false sense of security.
I have seen setups with incredibly expensive gear pointed directly at empty walls. On the flip side, I have seen highly affordable systems positioned perfectly that managed to capture every single detail that mattered.
Effective surveillance layout is entirely a matter of strategy. When done right, even a modest configuration can deliver excellent visibility, deep deterrence, and true peace of mind. Let’s walk through exactly how to position your gear for real-world, everyday effectiveness.
🚪 Start With Primary Entry Points
If you are completely unsure where to begin with your layout, always focus on the main doors first. The vast majority of residential property intrusions involve an unlawful entry right through a door or a ground-floor opening. That reality automatically makes your exterior entry points the absolute highest priority on your checklist.
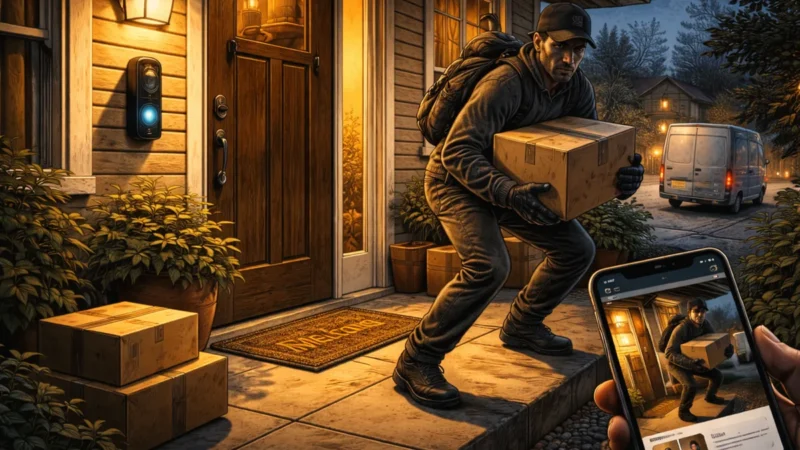
Your front door should always be your number one surveillance target. A dedicated doorbell unit works incredibly well here because it captures arriving faces at a completely natural angle. It is also an excellent tool for tracking daily package deliveries and preventing porch theft.
Do not ignore the back door or side entry paths during this process either. Many intruders prefer working in less visible areas, especially if heavy fencing or tall privacy landscaping blocks the view from the street. You want to make sure you cover every single door that leads directly into your living space.
Read More
To understand how real-world property intrusions unfold across various residential layouts, you can explore this detailed breakdown of how home burglaries actually happen real entry patterns to guide your early planning.
🪟 First-Floor Windows Matter More Than You Think
Ground-level windows are highly vulnerable access points that require intentional surveillance planning. However, you do not necessarily need a dedicated individual lens assigned to every single window pane on your ground floor.
Instead, smart security camera placement involves positioning your hardware to monitor clusters of windows or long exterior walls where multiple windows sit side by side. This allows a single wide-angle lens to track an entire side of your home simultaneously.
If a particular window faces a completely secluded side yard or a dark alleyway, it immediately becomes a much higher priority for your system. High visibility from the main street naturally reduces your overall risk, but secluded zones benefit immensely from direct, dedicated monitoring. Strategic angles allow you to stretch your hardware budget much further.
Vulnerability Indicators
- Secluded Windows: Hidden by dense structures or neighbor fences; requires a dedicated visual angle.
- Street-Facing Windows: Naturally deterred by public traffic, but still benefits from wide-angle contextual coverage.
- Sliding Glass Access: High-traffic areas that require a clear line of sight to catch tampering early.
🚗 Securing the Garage and Driveway
Garages are incredibly common targets for modern thieves, especially if the structure features an interior pass-through door that leads directly into the main house. Protecting this zone requires a clear view of both the vehicles outside and the valuable property stored inside.
When determining where to place security cameras, installing a lens that faces down the driveway is an excellent choice. This specific angle is particularly useful for documenting vehicles approaching your home, capturing clear license plates, and tracking general delivery activity around your boundary lines.
If your garage setup features a separate exterior walk-through door, treat it exactly like any other primary entrance and ensure it enjoys direct coverage. Inside the structure, place your hardware so it monitors your tools or bicycles without pointing directly into bright overhead fixtures that cause severe lens flare.
Expert Security Tip
Beating the Overhead Lights: When setting up interior garage surveillance, mount the camera below the lowest hanging light fixture line. This simple trick prevents severe backlighting and ensures your lens maintains a clear view even when the overhead garage door opens.
📐 Mount Cameras at the Right Height
Mounting height plays a massive role in both the overall coverage area and the final image clarity of your recorded footage. Discovering the best places to install security cameras always requires a careful balance between physical device accessibility and a clean, undistorted line of sight.
Outdoor units are typically mounted between 8 and 10 feet above the ground level. This specific height is highly effective because it keeps the physical hardware safely out of reach from casual tampering while remaining low enough to capture clear, recognizable facial features.
Mounting your gear too high up on a roofline reduces its identification value to nothing more than the tops of people’s heads. Conversely, mounting it too low leaves the physical unit vulnerable to being blocked or stolen. For the best results, aim for an optimal camera height placement that looks slightly downward to maximize your facial recognition capabilities.
Height Performance Guide
| Mounting Height | Main Advantage | Potential Risk |
| Below 7 Feet | Excellent facial detail and close-up clarity | Highly vulnerable to physical vandalism and lens masking |
| 8 to 10 Feet (Optimal) | Secure from ground reach while maintaining great identification angles | Requires a ladder for basic battery swaps or manual cleaning |
| Above 12 Feet | Massive wide-angle field of view across large yards | Disastrous top-down angles that miss crucial facial features |
📐 Avoid Blind Spots With Overlapping Coverage
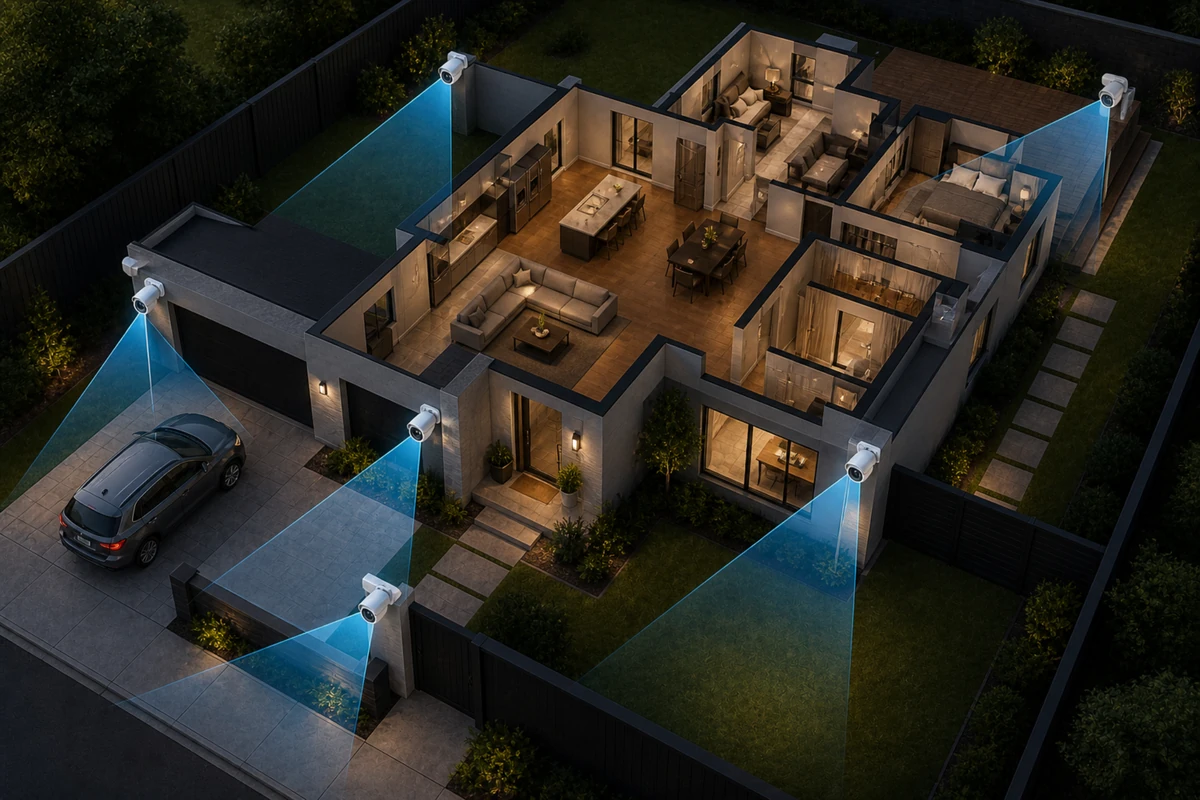
One of the most frequent layout mistakes homeowners make is treating their surveillance gear like completely isolated devices. To build a truly resilient perimeter protection system, you must learn how to position cameras for full coverage by creating intentional, slight overlap between adjacent units.
If one device suffers a sudden hardware failure or gets blocked by an obstacle, an adjacent unit can still record the activity. This integrated approach is especially useful along long driveways, extended fence lines, or expansive backyards where blind zones are easy to exploit.
You do not necessarily need perfect, military-grade 360-degree coverage across every square inch of grass. However, you absolutely want to use smart security camera placement tips outside house layouts to eliminate obvious blind zones near your primary doors and windows. This visual redundancy keeps your perimeter secure.
Read More
To explore how to integrate multiple lenses into a completely cohesive, multi-layered property defense plan, take a look at this structural overview of a layered home security a practical diy framework for your yard.
💡 Use Lighting to Support Your Cameras
Surveillance lenses rely heavily on high-quality ambient light to produce crisp images, even if they are equipped with advanced built-in night vision modes. Positioning your external hardware near existing light fixtures whenever possible will instantly improve your nighttime video quality.
Standard infrared night vision works well in complete darkness, but it naturally produces a monochrome, black-and-white video feed. Adding motion-activated floodlights into the mix allows your cameras to quickly capture critical color details, such as the exact shade of an intruder’s clothing or vehicle.
When you coordinate your physical camera positions to work directly alongside your exterior illumination instead of casting shadows against it, your nighttime performance sky-rockets. Lighting and video surveillance should always be treated as a single, unified system.
Expert Security Tip
Avoid the Blind Spot Reflection: Never point an infrared-enabled lens directly through a glass window pane to monitor the outdoors. The nighttime infrared light will bounce off the glass surface, blinding the sensor with a massive white reflection.
🛋️ Interior Camera Placement: Focus on Traffic Flow
When moving your surveillance planning inside the home, the overall strategy shifts completely. Indoors, you should focus your efforts entirely on common high-traffic spaces rather than private rooms.
Living rooms, central hallways, and the immediate areas surrounding your primary entry points are ideal interior locations. These are the natural bottleneck zones that anyone moving through your house must walk through, making them the most efficient spots for your hardware.
Always avoid placing active surveillance gear inside private spaces like bathrooms or bedrooms. Respecting the daily privacy of your family and guests is incredibly important, and a smart layout can easily secure the home without encroaching on these personal areas.
Read More
To find out more about analyzing public violent crime statistics and national tracking metrics across the country, you can view the official Federal Bureau of Justice Statistics Criminal Victimization Report to see macro trends.
🪜 Watch Staircases and Transition Points
Staircases and major hallway intersections act as natural architectural funnels within a home’s layout. If an unauthorized individual manages to enter the property, they must almost always pass through these specific transition points to access the rest of the rooms.
Positioning a high-definition lens to track a central stairwell or a main intersecting hallway allows you to monitor movement between different floors with ease. This strategic positioning drastically reduces the total number of individual devices you need to purchase for your interior spaces.
By prioritizing these unavoidable movement paths rather than trying to cover every single square foot of open floor plan, you increase your system’s overall efficiency. It allows you to maintain total visual control while keeping your smart home budget completely manageable.
Transition Zone Metrics
- Hallway Intersections: Captures lateral movement between bedrooms and main living spaces seamlessly.
- Staircase Bases: Tracks vertical movement between floor levels, ensuring no one changes levels unrecorded.
- Foyer Backdrops: Catures anyone moving away from the front entryway toward the interior core of the house.
👁️ Consider Camera Field of View
Not all surveillance lenses see the exact same amount of physical space. A camera’s true coverage potential is measured in degrees of field of view, and choosing the wrong lens style for a specific location can leave major gaps in your defense.
A very wide-angle lens captures a massive chunk of physical area, but it naturally reduces the crisp, fine details of objects sitting further away in the distance. Conversely, a narrow, tight angle provides highly focused detail but covers a much smaller amount of actual physical ground.
You should always deploy wide-angle hardware for broad, open outdoor areas like backyards or large family rooms. Use narrow, focused lenses for specific, targeted zones like a tight entryway door where capturing crisp facial characteristics is the primary goal.
Field of View Selection Strategy
| Lens Type | Typical Field of View | Best Use Case Location |
| Ultra-Wide Lens | 130° to 160° | Expansive backyards, open-concept living rooms, corner mounts |
| Standard Lens | 90° to 110° | Front porches, multi-car driveways, suburban walkways |
| Narrow Telephoto | 60° or less | Dedicated license plate tracking, narrow side alleys, entry gates |
🛡️ Protect the Cameras Themselves
When planning your layout, you must also think carefully about the physical security of the monitoring devices themselves. An easily accessible camera is highly vulnerable to being torn down, spray-painted, or unplugged before it can upload its footage.
Always avoid mounting your exterior hardware within easy arm’s reach of a standing adult. Use high-quality, tamper-resistant mounting screws and route all connecting wires safely out of sight inside conduits or behind exterior siding whenever possible.
If you are using wireless hardware, you must also verify that your local wireless signal remains incredibly strong at that exact mounting location. Weak network links can cause frustratingly delayed smartphone alerts or missed recordings, which completely defeats the purpose of your coverage.
Expert Security Tip
The Signal Strength Test: Before drilling permanent holes into your exterior stucco or siding, hold your active camera up at the exact installation spot for two full minutes. Check your smartphone app to ensure the wireless connection doesn’t drop out under real-world interference.
⚖️ Respect Privacy and Legal Boundaries
Smart camera placement must always respect local privacy laws and neighborhood boundaries. As a general rule of thumb, you have a clear legal right to record any open area within your own property lines, but you must avoid pointing lenses directly into your neighbor’s private windows.
Publicly viewable spaces like sidewalks, public streets, or shared alleys are typically fair game for contextual recording, but explicit laws can vary quite a bit depending on your exact municipality. Being highly intentional with your angles protects both your neighbors’ peace of mind and your own legal standing.
If a wide-angle layout accidentally catches a neighbor’s backyard patio, use your camera’s smartphone application to configure digital privacy zones. These software masks black out specific parts of the video stream, keeping your system legally compliant and neighborly.
Read More
To review the various strengths and weaknesses of using wireless systems compared to hardwired network alternatives, check out our guide on wired vs wireless sensors which is more reliable for a deeper look.
🪧 Do Not Forget About Signage
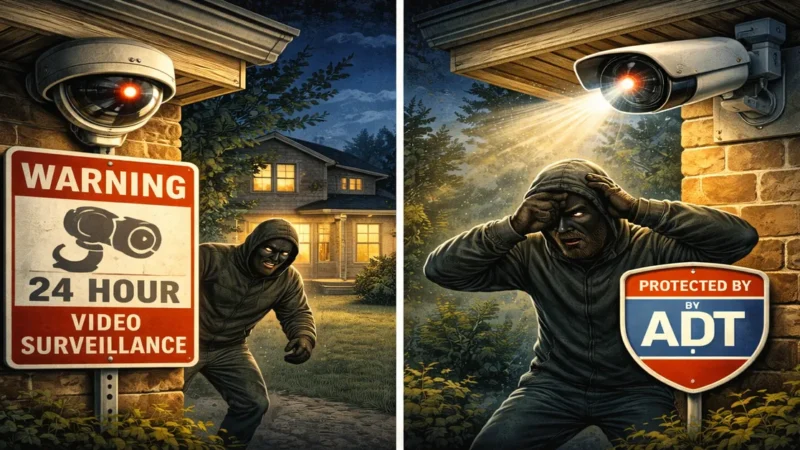
Even when working with a highly limited hardware budget, visible surveillance units and clear warning signs can serve as incredibly powerful deterrents. When a property looks challenging to exploit, most casual intruders will simply move on to an easier target.
When your hardware is clearly visible near your primary entry points, it signals to everyone that the home is actively monitored. This psychological layer reduces your overall security risk before a single second of footage is ever actually recorded.
Placing a warning sign near eye level at your front walkway reinforces this protective boundary perfectly. It ensures that your security layout works to prevent an incident from occurring in the first place, rather than just documenting the aftermath.
Read More
To find out whether warning placards and unpowered hardware options provide a meaningful drop in local property risk, read our analysis on do fake cameras and security signs actually work for real-world metrics.
🧪 Test Before You Finalize
Once your hardware is physically mounted, running a complete end-to-end performance test is absolutely essential. Walk slowly through your property during both the bright afternoon hours and the pitch-black night to see how your system responds.
Pay close attention to how your built-in motion detection zones trigger as you walk past. Review the recorded video history clips on your phone to check for unexpected blind zones, washing out from bright sunlight, or fuzzy nighttime details.
Small, incremental adjustments to a lens angle or a mounting bracket can dramatically improve your total coverage. This final testing phase is often overlooked by hurried homeowners, but it is the exact step where maximum real-world coverage is truly achieved.
Read More
To build a sustainable routine that ensures your lenses, sensors, and power supplies stay operational year-round, review our comprehensive home security maintenance checklist monthly yearly guide.
🧱 Layer Your Cameras With Other Security Measures
Visual monitoring tools are incredibly powerful additions to a modern home, but they should never be treated as complete, standalone solutions. For the best possible protection, you want to combine them with a variety of complementary defense layers.
Pair your camera positions with physical door contacts, interior motion sensors, reinforced deadbolts, and proper yard maintenance. While your lenses work beautifully to document and deter, physical door alarms provide the immediate audible response needed to scare off an active intruder.
Layering these different components together strengthens your entire household defense posture without forcing you to buy an excessive amount of redundant gear. Maximum coverage is never about raw product quantity; it is entirely about smart coordination.
Read More
To discover the exact functional differences between entry point alerts and interior motion detectors, take a look at our comparison of motion sensors vs contact sensors what you actually need.
🏁 Conclusion
Placing your security hardware effectively is all about prioritizing your main entry doors, understanding natural traffic patterns, and systematically eliminating vulnerable blind spots around your perimeter. Start with the front door, secure the ground-floor window clusters, and bring your garage into the mix.
Mount your gear at an optimal height, angle the lenses downward to catch clear facial details, and ensure your exterior lighting supports your video sensors at night. Inside, focus on common transition pathways rather than private personal rooms.
When you approach your home security with a clear strategy, you do not need to install dozens of expensive cameras to feel completely protected. You simply need thoughtful, intentional placement that aligns perfectly with how people actually move around your property.