🏠Best Ways to Mount Security Sensors (That Don’t Fail Over Time)

TLDR
- Surface preparation matters more than most people think: Clean, dry mounting surfaces dramatically improve long-term sensor reliability.
- Screws usually outlast adhesive: Adhesive strips work in some cases, but screws tend to hold up better through heat, humidity, and repeated door movement.
- Placement affects performance and lifespan: Poor alignment or high-impact locations can cause false alarms and early failure.
- Temperature, vibration, and moisture matter: Environmental stress slowly weakens mounts if you ignore where sensors are installed.
- A five-minute installation shortcut often becomes a six-month problem: Careful mounting upfront saves troubleshooting later.
Security sensors are funny little devices. When they work, you barely think about them. A door opens, you get a notification, and life moves on.
When they fail, though, your phone is buzzing at 2 a.m. because a crooked window sensor decided gravity was optional. A surprising number of issues have nothing to do with low batteries or network drops. The culprit is often much simpler: poor hardware installation.
If you want your perimeter to stay reliable year after year, learning how to mount security sensors properly matters more than people realize. When you first evaluate where to start with a DIY system, physical installation parameters should be prioritized alongside your software settings.
Getting it right requires a bit of patience, decent alignment, and resisting the urge to simply slap an adhesive strip onto dusty trim. Let’s look at how to ensure your entry triggers stay exactly where they belong.
🧼 Start With Surface Prep (Seriously)
This is the least exciting advice in home defense, but it is one of the most important steps to prevent sensors falling off. Most contact points, motion detectors, and glass-break sensors rely on stable, clean surfaces to bond properly. Dust, household oils, moisture, and paint residue will quietly destroy the chemical bond of adhesive backing surprisingly fast.
Before peeling the tape, clean the zone thoroughly. Use isopropyl alcohol or a manufacturer-approved cleaner to strip away structural oils from your frames. This step is non-negotiable for renters setting up apartment safety layers, where double-sided tape is the only allowed mounting medium.
Surface Prep Breakdown
| Surface Type | Structural Prep Needed | Long-Term Reliability |
| Clean Painted Wood | Light wipe down with rubbing alcohol | High |
| Finished Metal Trim | Degrease to remove manufacturing oils | High |
| Dusty Vinyl / PVC | Thorough scrub to remove loose dirt layer | Low (If skipped) |
| Peeling Paint / Varnish | Sand down to bare wood or sound substrate | Unreliable |
| High-Moisture Frames | Thorough drying; treat for humidity leaks | High Risk of Failure |
Skipping this basic step might save you a few minutes during your initial deployment. However, it usually leads to hardware swinging from frames or triggering massive false alarms down the line.
🔩 Screws Usually Win the Long Game
Let’s talk honestly about the adhesive vs screws security sensors debate. Tape is convenient, fast, and completely non-invasive. However, if your ultimate goal is a long lasting sensor installation, screws will outperform tape over a multi-year cycle.
Every time a heavy door slams, it sends vibrational energy directly through the sensor housing. Over time, that vibration shears the foam adhesive backing.
Furthermore, changing weather conditions put a heavy strain on sticky tape. For example, technical support diagnostics like the Google Nest open-door sensor guide explicitly note that structural vibrations and surface texture directly dictate whether hardware stays anchored or drops offline unexpectedly.
Choosing Your Fastener Path
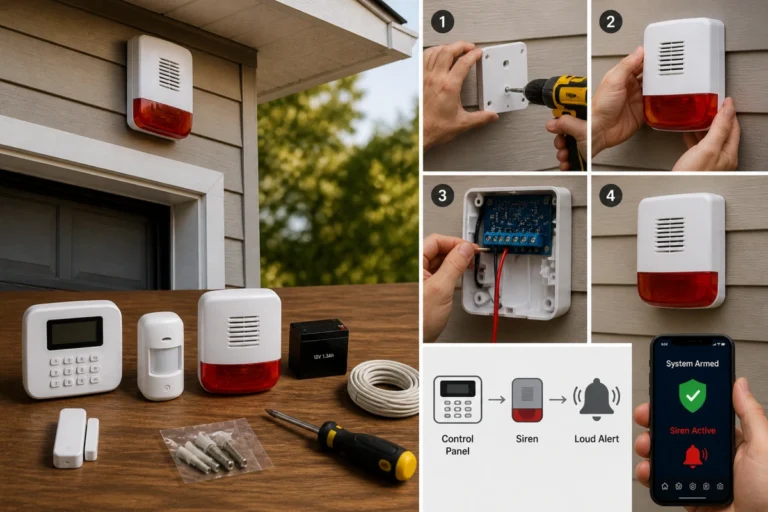
- Use Screws For: High-traffic main entry points, heavy external garage gates, and large motion detectors mounted on textured walls.
- Use Adhesive For: Inside rental properties, lightweight window triggers, and temporary minimalist security setups.
- Mechanical Anchor Benefit: Creates a permanent link that defies seasonal wood swelling and high household humidity.
If you must use tape, inspect the alignment every few months to make sure the casing isn’t beginning to bow away from the frame.
🚪 Alignment Tactics: The Golden Rule of Door Sensors
Even a perfectly anchored casing will cause systematic errors if the spacing is wrong. This applies directly to contact sensors, which utilize a magnetic reed switch to monitor boundaries. If you read your core DIY security guide books, you will see that every manufacturer defines a specific gap tolerance.
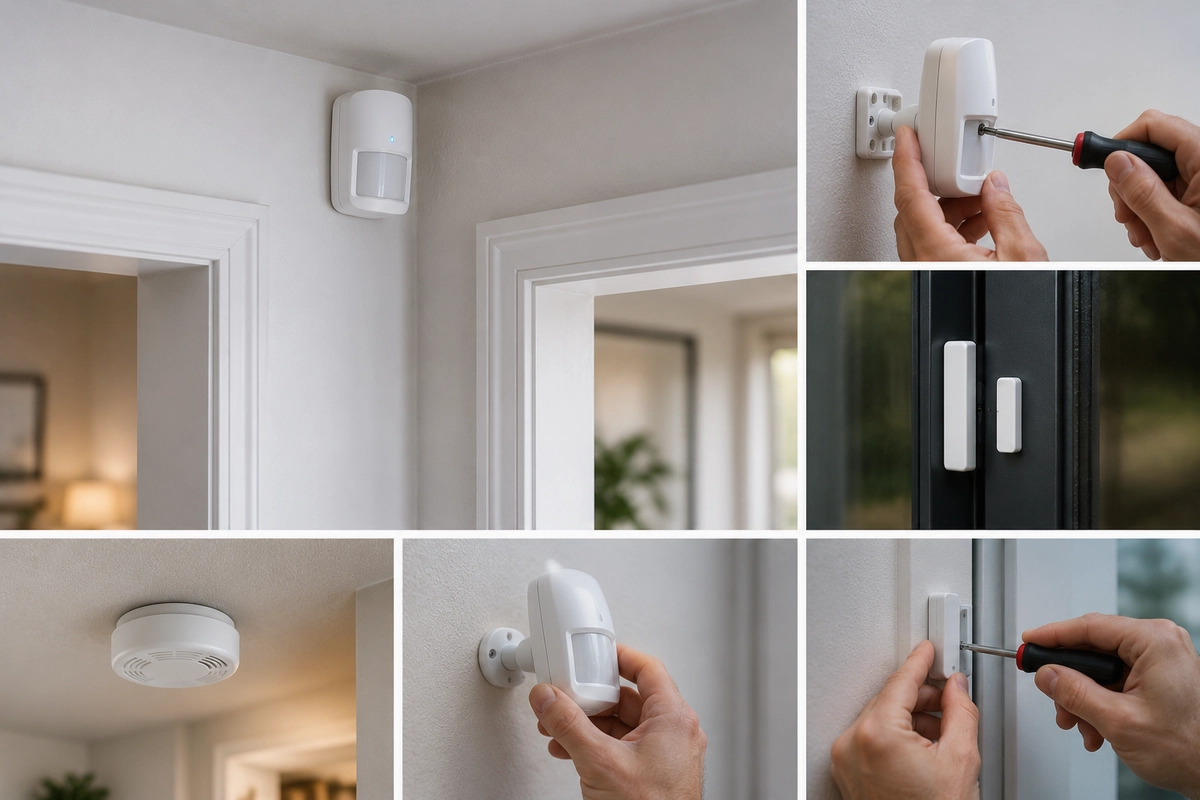
When studying how to mount door sensors, you must ensure the magnet and the sensor body sit within the recommended clearance zone (usually under half an inch). If the gap is too wide, the circuit won’t fully engage, leading to a host of performance issues.
[Correct Alignment] --> Sensor || Magnet (< 0.5 in) --> Stable Connection[Incorrect Alignment] --> Sensor | | Magnet (> 0.5 in) --> Constant False OpensSymptoms of Poor Spacing
- Random “Open” alerts on your smartphone while the door is physically closed and locked.
- Delayed system responses when a door is opened quickly by an occupant.
- Rapid battery drain as the internal transmitter constantly wakes up to report unstable states.
Always run a dry test by manually opening and closing the boundary several times before sinking your screws or applying pressure to your mounting tape.
🌡️ Environmental Stress and Weatherproof Sensor Mounting Tips
Properties move much more than people expect. Wood swells in humid summers, metal contracts in cold winters, and moisture can compromise your perimeter. If you are deploying hardware on a detached structure or an external gate, standard indoor tape will fail rapidly. You need specific weatherproof sensor mounting tips to protect your investments.
First, always use mechanical anchors for any device exposed to the outdoor elements. Second, ensure you are utilizing hardware with an appropriate weather rating. Placing a standard sensor in a damp garage or near an active bathroom vent introduces localized moisture that will corrode the interior battery terminals.
High-Stress Areas Requiring Mechanical Mounts
- External garage doors and rolling bay tracks.
- Sun-exposed front doors that bake in afternoon heat.
- Unheated basement entrywells and crawlspace hatches.
- Windows prone to heavy interior glass condensation.
Protecting these areas with solid anchors prevents your system from succumbing to common DIY home security failures when the weather turns harsh.
📍 Pick Smart Locations, Not Just Convenient Ones
Sometimes the easiest spot to reach is the absolute worst spot for long-term device health. When researching the best way to mount motion sensors, placement dictates both system accuracy and physical durability. For instance, PIR motion sensors should be mounted in corners rather than flat walls to leverage a wider field of view.
Avoid putting your perimeter components anywhere they can be physically struck by daily household activity. If a window sensor is placed where a hanging curtain or sliding blind constantly rubs against it, the casing will eventually be pulled out of alignment.
Strategic Location Choices
- Avoid Door Buffeting: Mount the sensitive sensor body on the stable door frame, and the smaller, passive magnet on the swinging door panel.
- Avoid Heat Sources: Keep motion detectors away from HVAC vents and direct sunlight to prevent false thermal triggers.
- Keep Out of Strife: Ensure sensors aren’t placed where opening doors can smash them into adjacent drywall.
By dodging these high-impact zones, you ensure you aren’t ignoring basic security threats due to an offline, damaged piece of hardware.
🔋 Remember Battery Access and Upkeep
This step is skipped constantly by enthusiastic installers. Don’t mount your devices in positions that make them an absolute nightmare to service later. Because eventually, the sensor batteries will drain.
If you mount a corner motion detector flush against the ceiling without leaving top clearance, you won’t be able to slide the battery hatch open. You will end up balancing on a chair, cursing under your breath while trying to pry the entire bracket off the wall.
Future-Proof Installation Checklist
- Verify which way the battery door slides (up, down, or forward) before finalizing the mount.
- Leave at least an inch of open clearance around the release tabs.
- Mount devices at heights you can safely reach with a standard household stepladder.
- Ensure the reset buttons remain accessible for when you need to upgrade or re-pair your system over time.
🏁 Conclusion: Sturdy Hardware Delivers Sturdy Defense
Nobody thinks about mounting techniques when shopping for high-tech security gear. People want to discuss 4K cameras or advanced app automation. But real, long-term perimeter defense depends on surprisingly boring decisions: clean surfaces, straight lines, solid screws, and logical layout choices.
If you take your time, prepare your frames, and anchor your gear mechanically, your sensors will quietly do their job for years without generating a single false alarm.
And honestly, that silent reliability is the absolute best compliment a home security system can get. Take an afternoon to audit your entry points, fix your sagging tape, and test your system regularly to ensure your home stays protected 24 hours a day.