🔔How to Install a Video Doorbell (Step-by-Step)

TLDR
- Most video doorbells are either battery-powered (easy install) or wired (more stable but requires basic wiring).
- Always check compatibility with your existing transformer (typically 8 to 24V AC) before installing.
- Turn off power before handling any wires, even though doorbells use low voltage.
- Installation usually involves mounting, connecting two wires, and syncing with an app.
- Testing and adjusting angle/placement is just as important as the install itself.
Installing a video doorbell sounds like one of those “weekend projects” that could go either way. But here is the reality: most setups are surprisingly manageable, especially if you take it step by step. Whether you are replacing an old wired doorbell or going fully wireless, the process is more about patience than technical skill.
I have done a few of these installs over the years, and the difference between a smooth setup and a frustrating one usually comes down to preparation, not tools.
This is a foundational part of any DIY home security where to start strategy. Let us walk through the process to install video doorbell hardware properly.
🔍 Step 1: Choose Your Type (Wired vs Battery)
Before you even touch a screwdriver, you need to know what you are installing. There are two main paths for a video doorbell setup guide, and each has its own requirements.
| Type | Installation Difficulty | Power Source | Best For |
| Battery-powered | Easy | Rechargeable battery | Renters, quick installs |
| Wired | Moderate | Existing doorbell wiring | Long-term reliability |
Battery models are straightforward. Mount, connect to Wi-Fi, done. This is often the best diy security setup for apartments because it does not require permanent changes to the building. Wired models take a bit more effort but offer continuous power, which means fewer interruptions and no charging.
If you already have a traditional doorbell, going wired usually makes sense for long term reliability, which is a key consideration when looking at how reliable wireless security systems are over time.
🧰 Step 2: Gather Tools and Check Compatibility
This is where most people rush, and regret it. First, confirm your existing system can support a video doorbell. Most require a transformer in the range of about 8 to 24 volts AC. If it is outside that range, the device may not work properly.
Then gather what you will need for your wireless video doorbell installation or wired setup:
- Screwdriver (usually included or standard Phillips)
- Drill (for mounting on brick or concrete)
- Wall anchors (often included)
- Voltage tester (recommended for wired installs)
- Your smartphone (for setup)
Also, make sure your Wi-Fi signal is strong at your front door. That is something people often forget until it is too late, and it is a major factor in common DIY home security failures. You can find more detail on this in TechRadar’s smart doorbell guide.
⚡ Step 3: Turn Off Power (For Wired Installs)
If you are installing a wired doorbell, this step is non-negotiable. Even though doorbells use low voltage, the transformer connects to your home’s electrical system. Cutting power removes any guesswork.
Safety reminder:
- Turn off power at your breaker.
- Confirm the doorbell no longer works.
- Use a voltage tester if you have one.
It takes two minutes and avoids unnecessary risk. This is a basic habit for testing your home security system regularly and safely.
🔧 Step 4: Remove Your Existing Doorbell
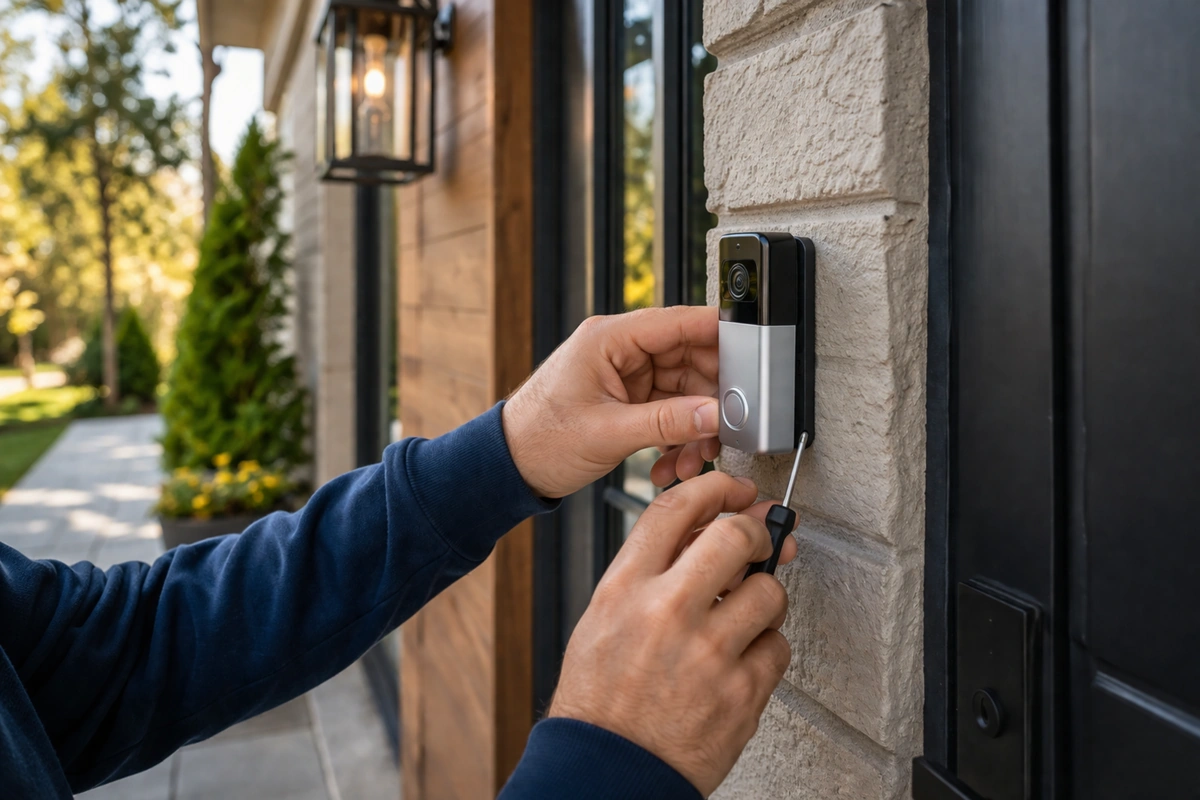
Now you are ready to remove the old unit. Unscrew the existing doorbell button and gently pull it away from the wall. Keep the wires in place, do not let them fall back inside the wall.
You should see two wires. That is your low-voltage circuit. Disconnect them carefully. There is no polarity to worry about here, so you do not need to label which wire is which. This is a much simpler task than securing sliding glass doors or other physical entry points.
🔌 Step 5: Connect the New Doorbell
This is the part that sounds intimidating but usually is not. Most video doorbells use the same basic connection:
- Attach the two existing wires to the terminals on the back of the new doorbell.
- Tighten the screws securely.
It does not matter which wire goes to which terminal in most standard setups. The circuit simply completes when the button is pressed. If your system includes a power module or chime adapter, you may need to install that inside your indoor chime box.
You can refer to this Eufy wiring guide for specific chime box details. This redirection of power is essential for fail-safe planning.
🧱 Step 6: Mount the Doorbell
Once the wiring is done, it is time to mount the unit. Proper placement is vital for assessing your home like a burglar would and ensuring you have a clear view.
- Install at about chest height (around 1.2 to 1.5 meters).
- Angle slightly toward where visitors will stand.
- Avoid pointing directly into sunlight.
Use the mounting bracket as a template. Mark your holes, drill if needed, insert anchors, then screw everything in place. Take your time here. If you follow mount ring doorbell instructions specifically, they often include a leveling tool to ensure it is not crooked.
📶 Step 7: Connect to Wi-Fi and Set Up the App
Now for the digital side. To connect video doorbell to WiFi, most manufacturers follow a similar process:
- Download the manufacturer’s app.
- Create or log into your account.
- Scan a QR code or connect via Bluetooth.
- Enter your Wi-Fi details.
- Wait for the device to sync.
This usually takes a few minutes. If it fails, it is often a Wi-Fi issue, not the doorbell itself. Standing close to your router during setup can help. For long-term stability, look into optimizing Wi-Fi for home security devices to prevent drops.
🔔 Step 8: Test Everything
Before you call it done, run through a quick test. Press the doorbell and check notifications. Confirm live video works, test two-way audio, and check motion detection alerts. This is a critical part of diy home security systems explained.
If you have an indoor chime, make sure it still works. This is also a good time to adjust motion zones so you are not getting alerts for every passing car, which helps avoid the most common security mistakes homeowners make.
🎯 Step 9: Fine-Tune the Angle and Settings
Installation is not really finished until you have dialed things in. A few small tweaks make a big difference:
- Adjust motion zones to focus on your entryway.
- Lower sensitivity if you are getting too many alerts.
- Use angled mounts if your doorbell is too close to a wall.
I have had installs where everything worked perfectly, but the camera missed packages because of the angle. A quick adjustment fixed it instantly. This level of detail is why DIY home security vs professional monitoring often comes down to personal attention to setup.
🧠 Common Mistakes to Avoid
A few things trip people up more than they should during the how to install video doorbell step by step process:
- Skipping the transformer compatibility check.
- Forgetting to turn off power.
- Letting wires fall back into the wall.
- Mounting too high or too low.
- Ignoring Wi-Fi signal strength.
None of these are complicated, but they can slow you down if you are not expecting them. Troubleshooting video doorbell install issues usually starts with checking these five factors.
🏁 Conclusion: Easier Than It Looks
Installing a video doorbell is not complicated; it just has a few moving parts. Once you break it down, it is mostly about connecting two wires, mounting a bracket, and setting up an app. The rest is just fine-tuning.
Whether you go wired or battery-powered, the end result is the same: a clearer view of what is happening at your front door and a bit more control over your home’s security.
This fits perfectly into a layered home security framework. Take your time, follow the steps, and do not rush the small details. That is what makes the difference between “installed” and “set up properly.”